
14 October 2026
HOW TO: Field-shooting techniques
The hunting field presents many challenges. Learning field-shooting techniques will enable you to shoot well under adverse conditions, provided you practise these. – BY GREGOR WOODS
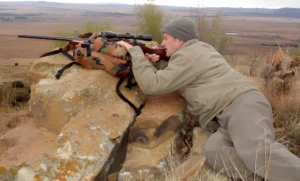
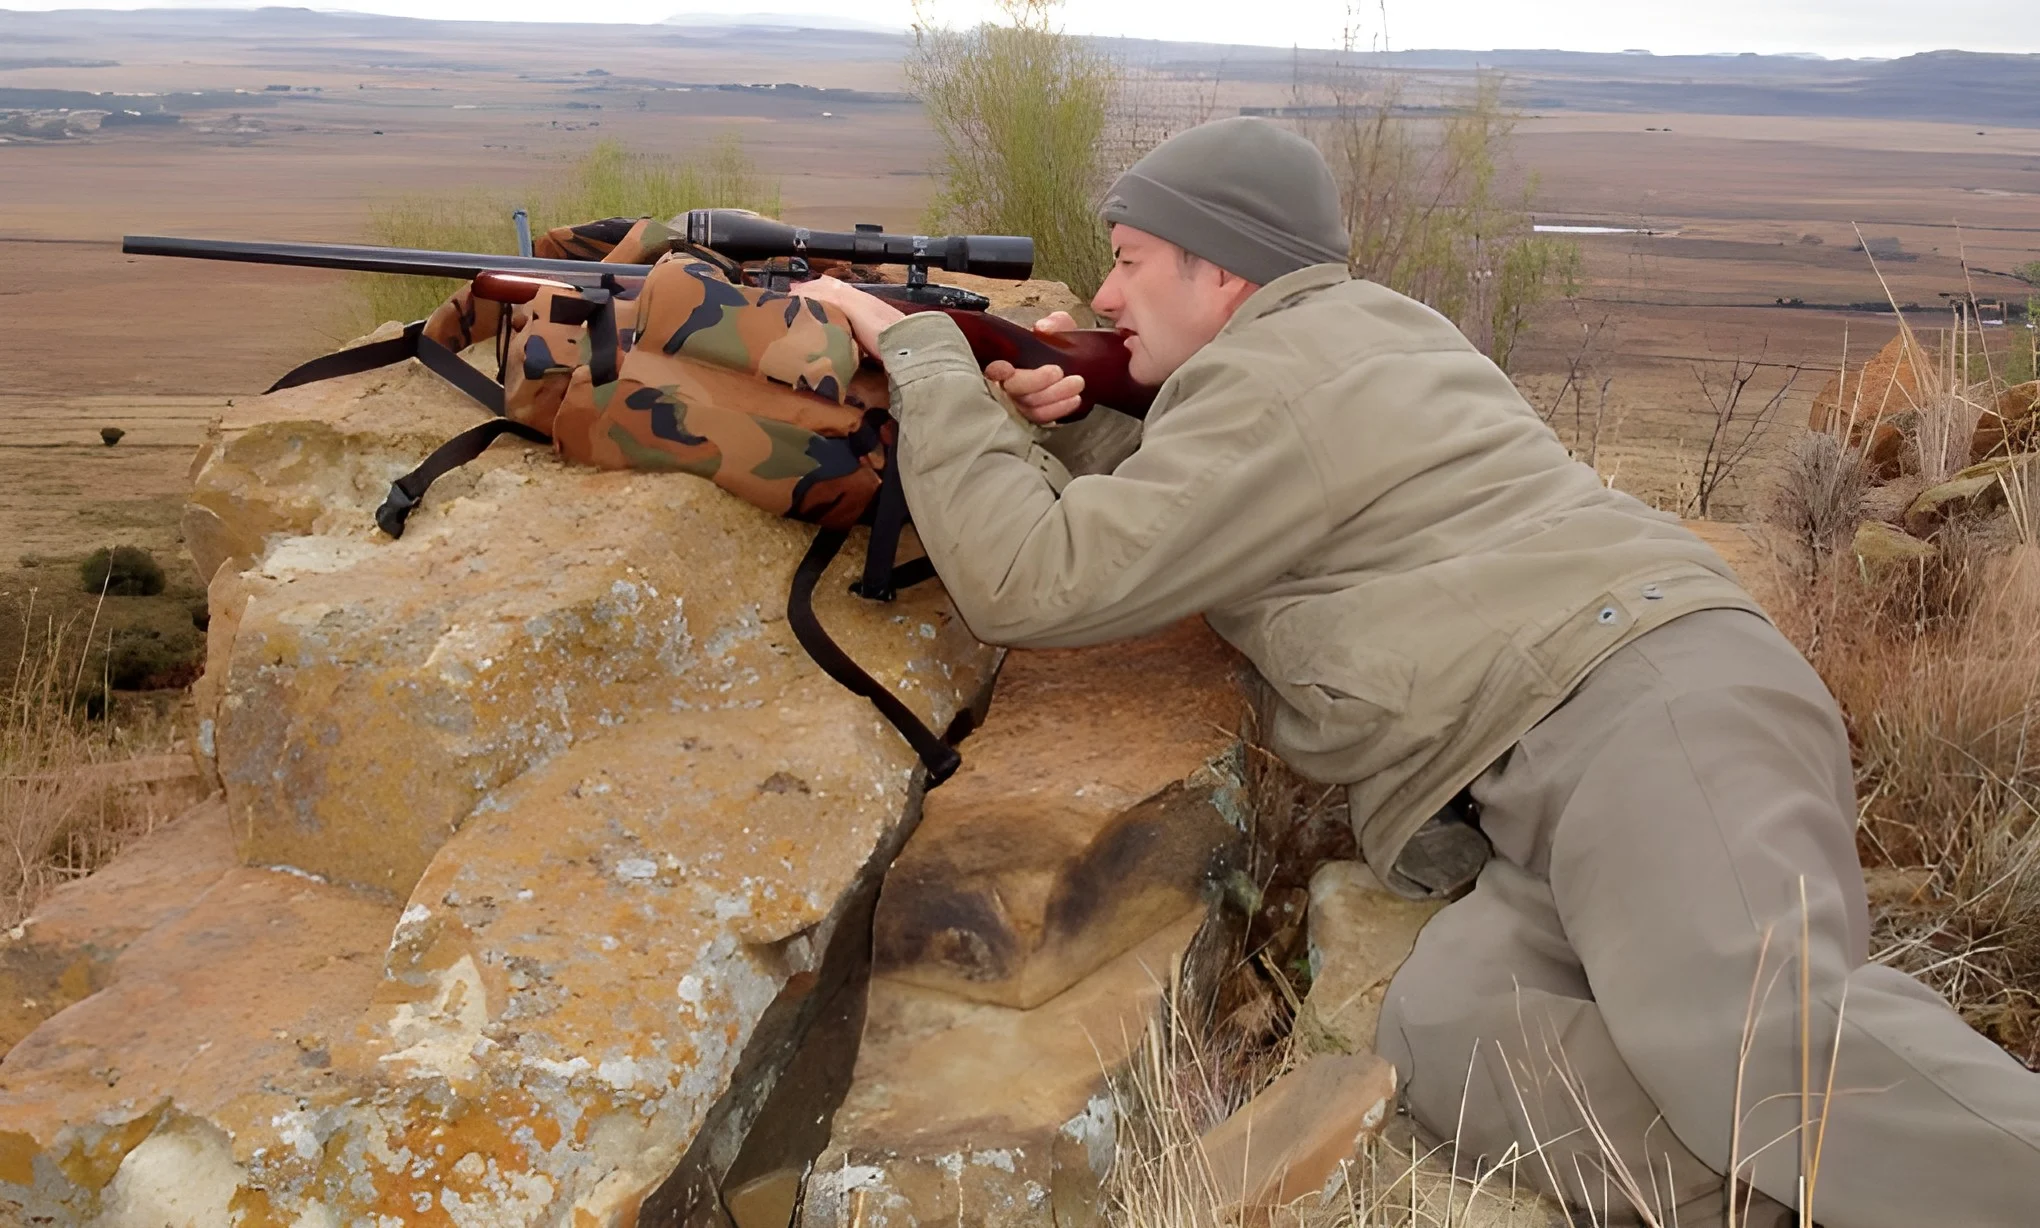
Never rest your rifle on a hard surface – use something soft like your Camel-Bak backpack as a rest.
Simply put, accurate shooting comes down to aligning the sights with the target and then releasing the trigger without disturbing the alignment. This is not unduly difficult when sitting at a purpose-designed shooting bench with both elbows solidly supported, while resting the fore-end atop a heavy sandbag (and assuming undisturbed concentration in the shooter).
But remember: recoil commences before the bullet exits the muzzle. Therefore, achieving consistent accuracy, shot after shot, requires a precisely consistent hold and bodily stance to get consistent absorption of the recoil. Any inconsistency during recoil results in the muzzle being in a slightly different position as the bullet exits, sending it off course.
The hunting field presents a very different scenario. You may have to shoot offhand from the standing position, or from the kneeling, seated or prone position. If you are fortunate to have a convenient tree, rock or termite mound to serve as a dead rest, it will be very different from a benchrest and unlikely to offer support for your elbows.
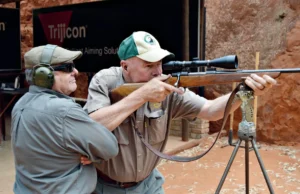
A hunting buddy or guide can be of great assistance when shooting over a tripod or bipod in the standing position. The guide holds his one arm against his body, and the hunter rests his trigger arm’s elbow in the crook of the guide’s elbow – that way, a steady hold is easier to achieve.
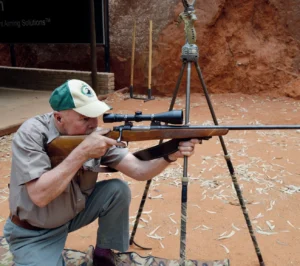
A tripod is useful in that one of its legs can be used as a rifle rest from the kneeling, sitting and prone positions. Note that the rifle’s fore-end rests on the shooter’s hand, not directly against the tripod leg.
Also, other forces will work against you – excitement, pressure, even stress – which can have an extremely adverse effect on practical accuracy. Hunters whose preparation for the season amounts to firing a few shots from a benchrest to check their rifles are all too often those who miss or wound game. Learning field-shooting techniques will enable you to shoot well enough under adverse conditions, provided you practise these.
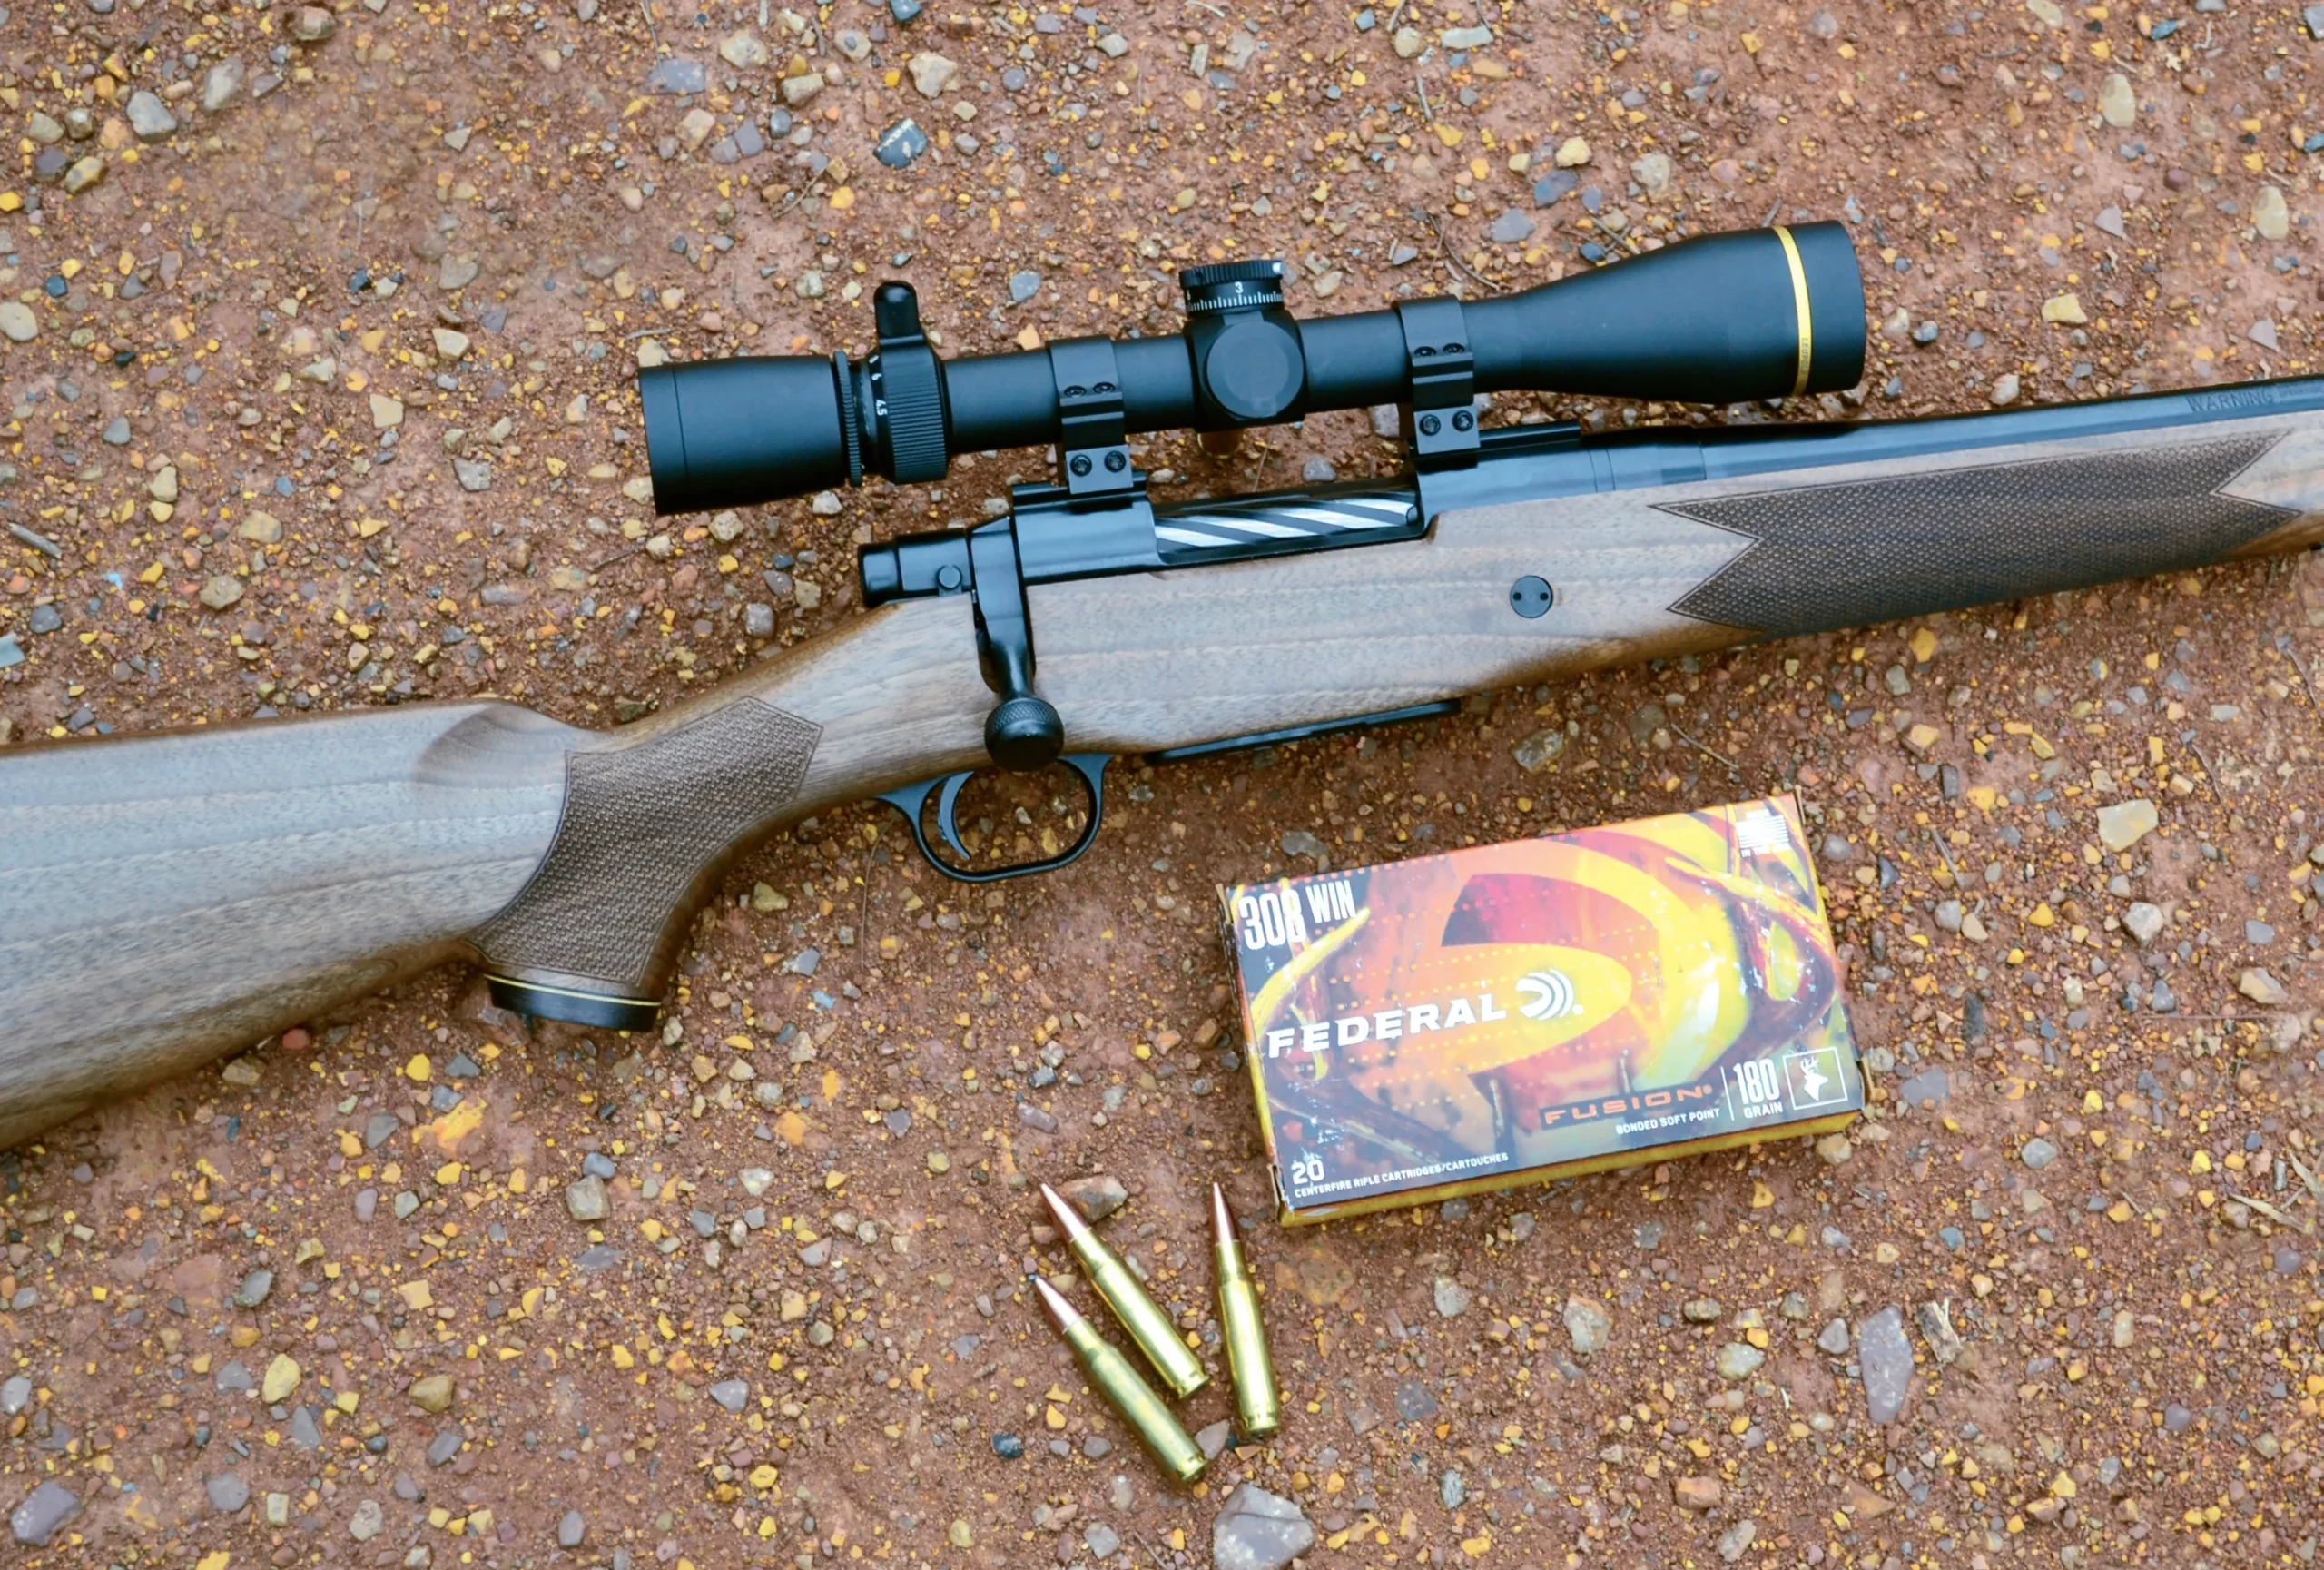
For consistent, practical accuracy, a very important factor is the height of the scope relative to the stock’s comb. With the rifle mounted to your shoulder, the comb must press snugly beneath your cheekbone while precisely aligning your eye with the scope.
This provides three interacting contact points: your hand exerts slight rearward pressure on the pistol grip, your shoulder exerts slight forward pressure on the butt, while your cheekbone exerts slight downward pressure on the comb. I call this the “triangle of tension”, which provides the steadiest, most consistent “lock-up”. If you have a steady surface on which to rest your elbows and/or supporting hand, providing slight “upward” pressure on the rifle, so much the better.
I emphasise that the comb must press snugly under your cheekbone – not against the middle of your cheek or against your jawbone. The underside of your cheekbone provides a consistent “ceiling” to arrest the raised rifle at exactly the same level every time – which must naturally align your eye precisely with the scope’s axis.
You shouldn’t have to move your head about to find the “full-moon” sight picture. Too many hunters struggle due to needlessly tall scope mounts, which require the shooter to lift his cheekbone off the comb to aim, thus losing that all-important “ceiling” and downward pressure point. This problem is mostly due to factory-built rifles whose stocks are designed for use with open (“iron”) sights. Consequently, a scope must be mounted high enough to align above the iron sights – the comb is too low for this.
This problem also arises with the use of needlessly powerful scopes that have bigger ocular lens housings; hence it must be mounted higher for the lens housing to clear the raised bolt handle. Likewise, scopes with needlessly large objective lenses must be mounted high enough for the front lens housing to clear the barrel.
Some synthetic stocks now have adjustable combs for high-mounted scopes, but this makes for a clumsy and vulnerable combination in the hunting field. You don’t need a 15x scope or a 50 mm objective lens for hunting in sunny Southern Africa. Use a compact scope that can be low-mounted to match your stock – it will make all the difference to your practical accuracy potential. If necessary, remove the elements of the iron sights (when did you last need them?).
I will assume your hunting rifle is intrinsically (inherently) accurate with your hunting load, and that its trigger sear releases cleanly, as when snapping a glass rod, with no “creep”. Squeezing a gritty trigger disturbs the aim. Most triggers can be improved by a competent gunsmith. On a hunting rifle, the pull weight should be between 1 kg and 1,5 kg. Practise dry-firing – squeezing the trigger, rather than pulling it, must become instinctive.
Most misses or wounding are the result of rushing the shot and snatching at the trigger, which disturbs the aim. Don’t fill your lungs and hold your breath while aiming – this raises your heart rate and makes you tense. Breathe normally until ready to fire, then, on the exhale, momentarily catch your breath as you squeeze the trigger.
I will also assume you will have zeroed your scope at a distance appropriate to the terrain in which you will be hunting – call the landowner in advance to determine the range at which most shots are likely to be taken. Hunting desert gemsbuck, springbuck or blesbuck on flat, open plains generally requires longer shots than hunting impala or kudu in bushveld.
Zero your scope accordingly, using the identical load you intend hunting with. Having zeroed at, say, 200 m, also determine where the same load hits at 100, 150, 250 and 300 m for unexpected shots which may present themselves.
Determine this empirically (on the shooting range), not by means of published bullet drop charts or computer programs. Factors such as barrel length, rate of twist and, most importantly, the height of your particular scope above the bore, significantly alter trajectories. Memorise these trajectory details or write them on a slip of paper and tape it to your rifle stock.
Rifle straps are generally undesirable for hunting dangerous game in dense bush as they can snare on branches just when you have incurred the displeasure of a bitchy cow elephant or bellicose buffalo. For all other hunting, however, I highly recommend the use of a suitably adjusted rifle strap.
Apart from affording convenient carry and freeing your hands for using binoculars and rangefinders, they are indispensable for providing a steadier hold on your rifle when shooting from the offhand, kneeling, sitting and prone positions. Various designs offer differing systems, but the ordinary single strap employed in the Bisley manner is perfectly adequate. It wraps tightly around the outer side of your supporting arm’s bicep, then the inner side of the wrist to steady the fore-end.
Slings that attach to a barrel band are fine for calibres from 9.3 mm up, but they adversely affect the vibrations of thinner barrels. For hunting rifles in calibres of .338 and smaller, I therefore recommend fore-end swivels.
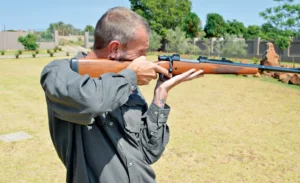
In the standing, offhand position, the supporting arm forms a vertical pillar beneath the fore-end, and the hand supports the rifle; it does not grip it or pull it rearwards. In this instance, no rifle sling was used on this custom .450 Rigby.
FIELD-SHOOTING TECHNIQUES
Obviously, the bodily position you assume for a given shot will depend on the terrain. Long grass and bush generally rule out the prone position. However, if you have a choice, understand that the more bodily contact you have with the ground, the steadier you will be. Hence the prone position is steadier than the sitting position, which in turn is steadier than the kneeling position, which again is steadier than the standing, offhand position. This also applies if you have a dead rest for the rifle’s fore-end, such as a tree, rock or “shooting sticks”.
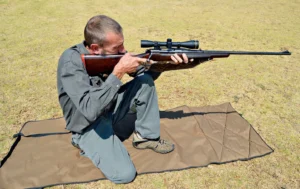
The kneeling position. Note that the left elbow is hooked around the left knee and pulls back on it – the elbow does not rest on the knee.
We’ll start with positions that lack a rifle rest.
The prone position affords the huge advantage of a solid rest for both elbows. I am steadier shooting from the prone position with no rifle rest than I am when standing up with the rifle resting on shooting sticks. In the Drakensberg Mountains, where the grass is short, I use the prone position more than any other. But then, I did Bisley shooting while in high school, so the prone position comes naturally to me – it may not to you. Of course, a rifle strap is paramount for optimum steadiness.
Lie at roughly a 45-degree angle to the target with legs outspread. A right-handed shooter’s left elbow should be positioned directly under the fore-end so that the forearm forms a solid, vertical pillar supporting the rifle. Just remember: the prone position does not allow your torso to rock back with the recoil, so don’t get your eye too close to the ocular lens or the scope will smack you on the eyebrow.
The sitting position, done properly, is very steady. Sit flat on your buttocks, facing at a slight angle away from the target. Your left arm firmly engages the rifle strap as usual. Hook your ankles together and draw your knees up, keeping them apart, then position both your elbows on the inner sides of your knees.
Never rest your elbows on top of your knees, as the loose skin and cartilage will cause wobbling. Position your left elbow directly under the fore-end so that your forearm serves as a vertical pillar. Now, draw your knees inward to hug your elbows while simultaneously pressing your elbows outwards against the inside of your knees.
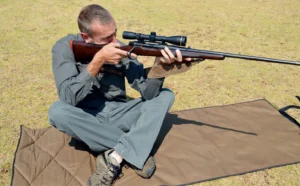
In the sitting position, the ankles are hooked together, and the elbows are inside the knees to achieve the “push-pull” lock-up between the elbows and knees. The elbows must not rest on top of the knees.
This push-pull technique provides a steady lock-up for the rifle, and with a little practice, you’ll be surprised how accurately you can shoot this way – with no rifle rest. It is very quick to assume and a great boon in long grass on treeless plains.
The kneeling position is less steady but very fast to assume, hence useful in bushveld where you often have to shoot quickly and beneath overhanging vegetation. Engage the rifle strap as usual and face away from the target at roughly a 45-degree angle. A right-handed shooter has his left knee raised, right knee on the ground, with his buttock resting firmly on his right heel. Now, for this shot, you hook your left elbow over your left knee and pull it backwards against that knee (again, never rest your elbow atop a wobbly kneecap).
The standing, offhand position is the least steady but the fastest into action. It is often essential in bushveld, so it merits practising. Standing offhand, metal silhouette competitors shoot goat-sized targets at 500 m. Granted, they don’t have to hit a small vital area as hunters must, but the better ones could reliably do so at 200 m. I’m not suggesting you take offhand shots at 200 m when hunting, but for shots at 100 m or so, you’d do well to adopt the stance used by the metal silhouette competitors.
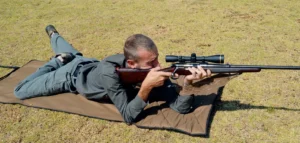
The prone position. Note the use of the sling and that the left elbow is directly beneath the rifle.
Stand at an angle of almost 90 degrees to your target, engage the rifle strap as usual, and position your left elbow directly beneath the rifle to provide that vertical pillar. The hand merely supports the fore-end; it does not grip it or draw it rearwards. Now press your supporting elbow rearwards against your rib cage for steadiness (this usually requires your hand to be further back on the fore-end than usual – nearer the trigger guard or even under it in some cases).
However, for very fast, close-range bushveld shots, I tend to ignore the strap, hold the fore-end normally and use the rifle as I would a shotgun.
You have probably read the advice that you should raise the elbow of your trigger arm to shoulder height, but I’ve never found this to be of any help to me; I suggest you position your shooting arm as you find most natural.
I must add that it is physically impossible to hold a rifle absolutely steady from the offhand position – the crosshair will always waver to some extent. At close ranges, provided it doesn’t waver too near the periphery of the vital area, you can still take the shot. But for slightly longer shots, here is my suggestion: don’t try to hold it steady on the vital area – you’ll only end up snatching the trigger as the crosshair sweeps across it.
Rather move the crosshair deliberately. Relax and get the crosshair well below the vitals, then slowly and smoothly bring it up in a straight line so that you can see precisely when it is going to enter the vital area – then touch off the shot. This requires a good trigger and plenty of practice on the shooting range to ensure you don’t fire too early or too late during the crosshair’s travel.
RIFLE RESTS
It is usually advisable to take advantage of any firm surface that conveniently presents itself for steadying your rifle, such as a rock, termite mound, tree trunk or branch. However, rule number one is never to allow the barrel of your rifle to touch any surface, as this alters its vibration pattern, hence altering the bullet’s point of impact. Rule number two is never to lean or rest your rifle’s fore-end directly on any hard surface, as this has much the same effect.
Rest the fore-end on a cushioned surface such as your daypack or a folded jacket (even a hat) placed on the solid surface. If in haste, hold the fore-end as normal and rest the back of your supporting hand on the hard surface, or rest the fore-end atop your balled fist. If using a vertical surface such as a tree trunk, position your hand in such a way as to bring it between the fore-end and the trunk.
One way is to extend your supporting hand, palm away from you, forming a “V” between thumb and forefinger to hold the fore-end while resting the ball of your thumb against the tree stem, or alternatively, the back of your hand, depending which side of the tree trunk you’re using. You can grasp a vertical stem or branch in your hand and rest the fore-end on your wrist. Do whatever works for you to keep flesh between the rifle and the hard surface.
I have scant experience with bipods attached to the rifle. I see these as useful only for shooting from the prone or seated positions, which is very limiting in bushveld. I’ve never seen one that extends to the standing position and doubt that it would be very steady. Bipods are slow into action if the legs must be adjusted independently for uneven ground. Also, you cannot detach the bipod without resighting in the scope, as detaching it alters the recoil pattern.
Shooting sticks are quite popular. However, just two crossed sticks held by the supporting hand work only from the sitting position where your knees can support your arms. Standing, I prefer shooting offhand with a rifle strap. Three sticks are better if you have someone to carry them for you.
An advantage is that you can use one of the legs to steady the rifle when shooting from the prone or sitting position. For the standing position, they are better than nothing, but you still have no elbow rest. And they are useless if you’ve had to leopard-crawl into position and have to remain low to take the shot without spooking the quarry.
I also find them slow and awkward to set up, and no help on broken ground, especially in hilly or mountainous terrain. Still, many hunters use them with success – to each his own. As with all field-shooting methods, you need to practise them before entering the field.
(This article was published in KOLSKOOT 2022.)
ALSO READ